PostHog can capture frontend events automatically using autocapture. This means you do not need to manually instrument tracking for individual components, links, buttons or other parts of your product to get started at analyzing user behavior.
Autocapture is available for our JavaScript snippet, JavaScript SDK, React SDK, and React Native SDK.
Capturing additional properties in autocapture events
If you add a data attribute onto an element in the format data-ph-capture-attribute-some-key={someValue}, then any autocapture event from that element or one of its children will have the property some-key: 'someValue' added to it. This can be useful when you want to add additional information to autocapture events.
For example, with a notification bell:
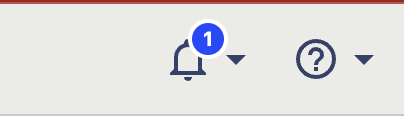
You can include the unread count in the autocapture event by adding the data-ph-capture-attribute class like this:
The autocapture event for clicks on the bell will include the unread count.
Limitations of autocapture
While autocapture tracks the majority of general events on your site, it is important to note that, for security reasons, PostHog is conservative regarding input tags. To prevent passwords or other sensitive data from being collected, little data is collected from inputs with autocapture.
Specifically, PostHog autocapture only grabs the name, id, and class attributes from input tags.
If you need to collect more data from inputs, you should use custom events.
Configuring autocapture
This section covers configuring autocapture in the JavaScript and React SDKs. For the React Native SDK, see our React Native docs.
Reducing events
Autocapture enables you to start capturing events on your site quickly, but this can lead to large numbers of events. To counteract this, you can configure autocapture using allowlists. Allowlists are an array of allowed events – any events for elements not matching an item in the array are dropped.
For example, to only capture clicks on buttons on the docs section of the website that contain the data attribute ph-autocapture, you can do the following:
Allowlists only filter autocapture events – they won't affect the data collected by session recordings or custom events.
Preventing sensitive data capture
PostHog tries to not capture any sensitive data from your website. If there are elements, you don't want to be captured, you can add the ph-no-capture class name to prevent them from being autocaptured.
Disabling autocapture
Autocapture is enabled by default. You can disable autocapture completely by setting autocapture: false in the config. You can also disable autocapture in your project settings.
Disabling autocapture will not disable session recording. You can disable session recording using disable_session_recording or by turning it off in your project's settings.