Objective
Integrating PostHog with your Shopify store
Why is this useful?
Tracking how users use your Shopify store can help you improve the user experience and increase conversion rates on your e-shop.
Prerequisites
To follow this tutorial along, you should:
- Have deployed PostHog or be using PostHog Cloud.
Step-by-step instructions
Get your PostHog snippet from your 'Project Settings' or the initial PostHog setup
Login to your Shopify dashboard
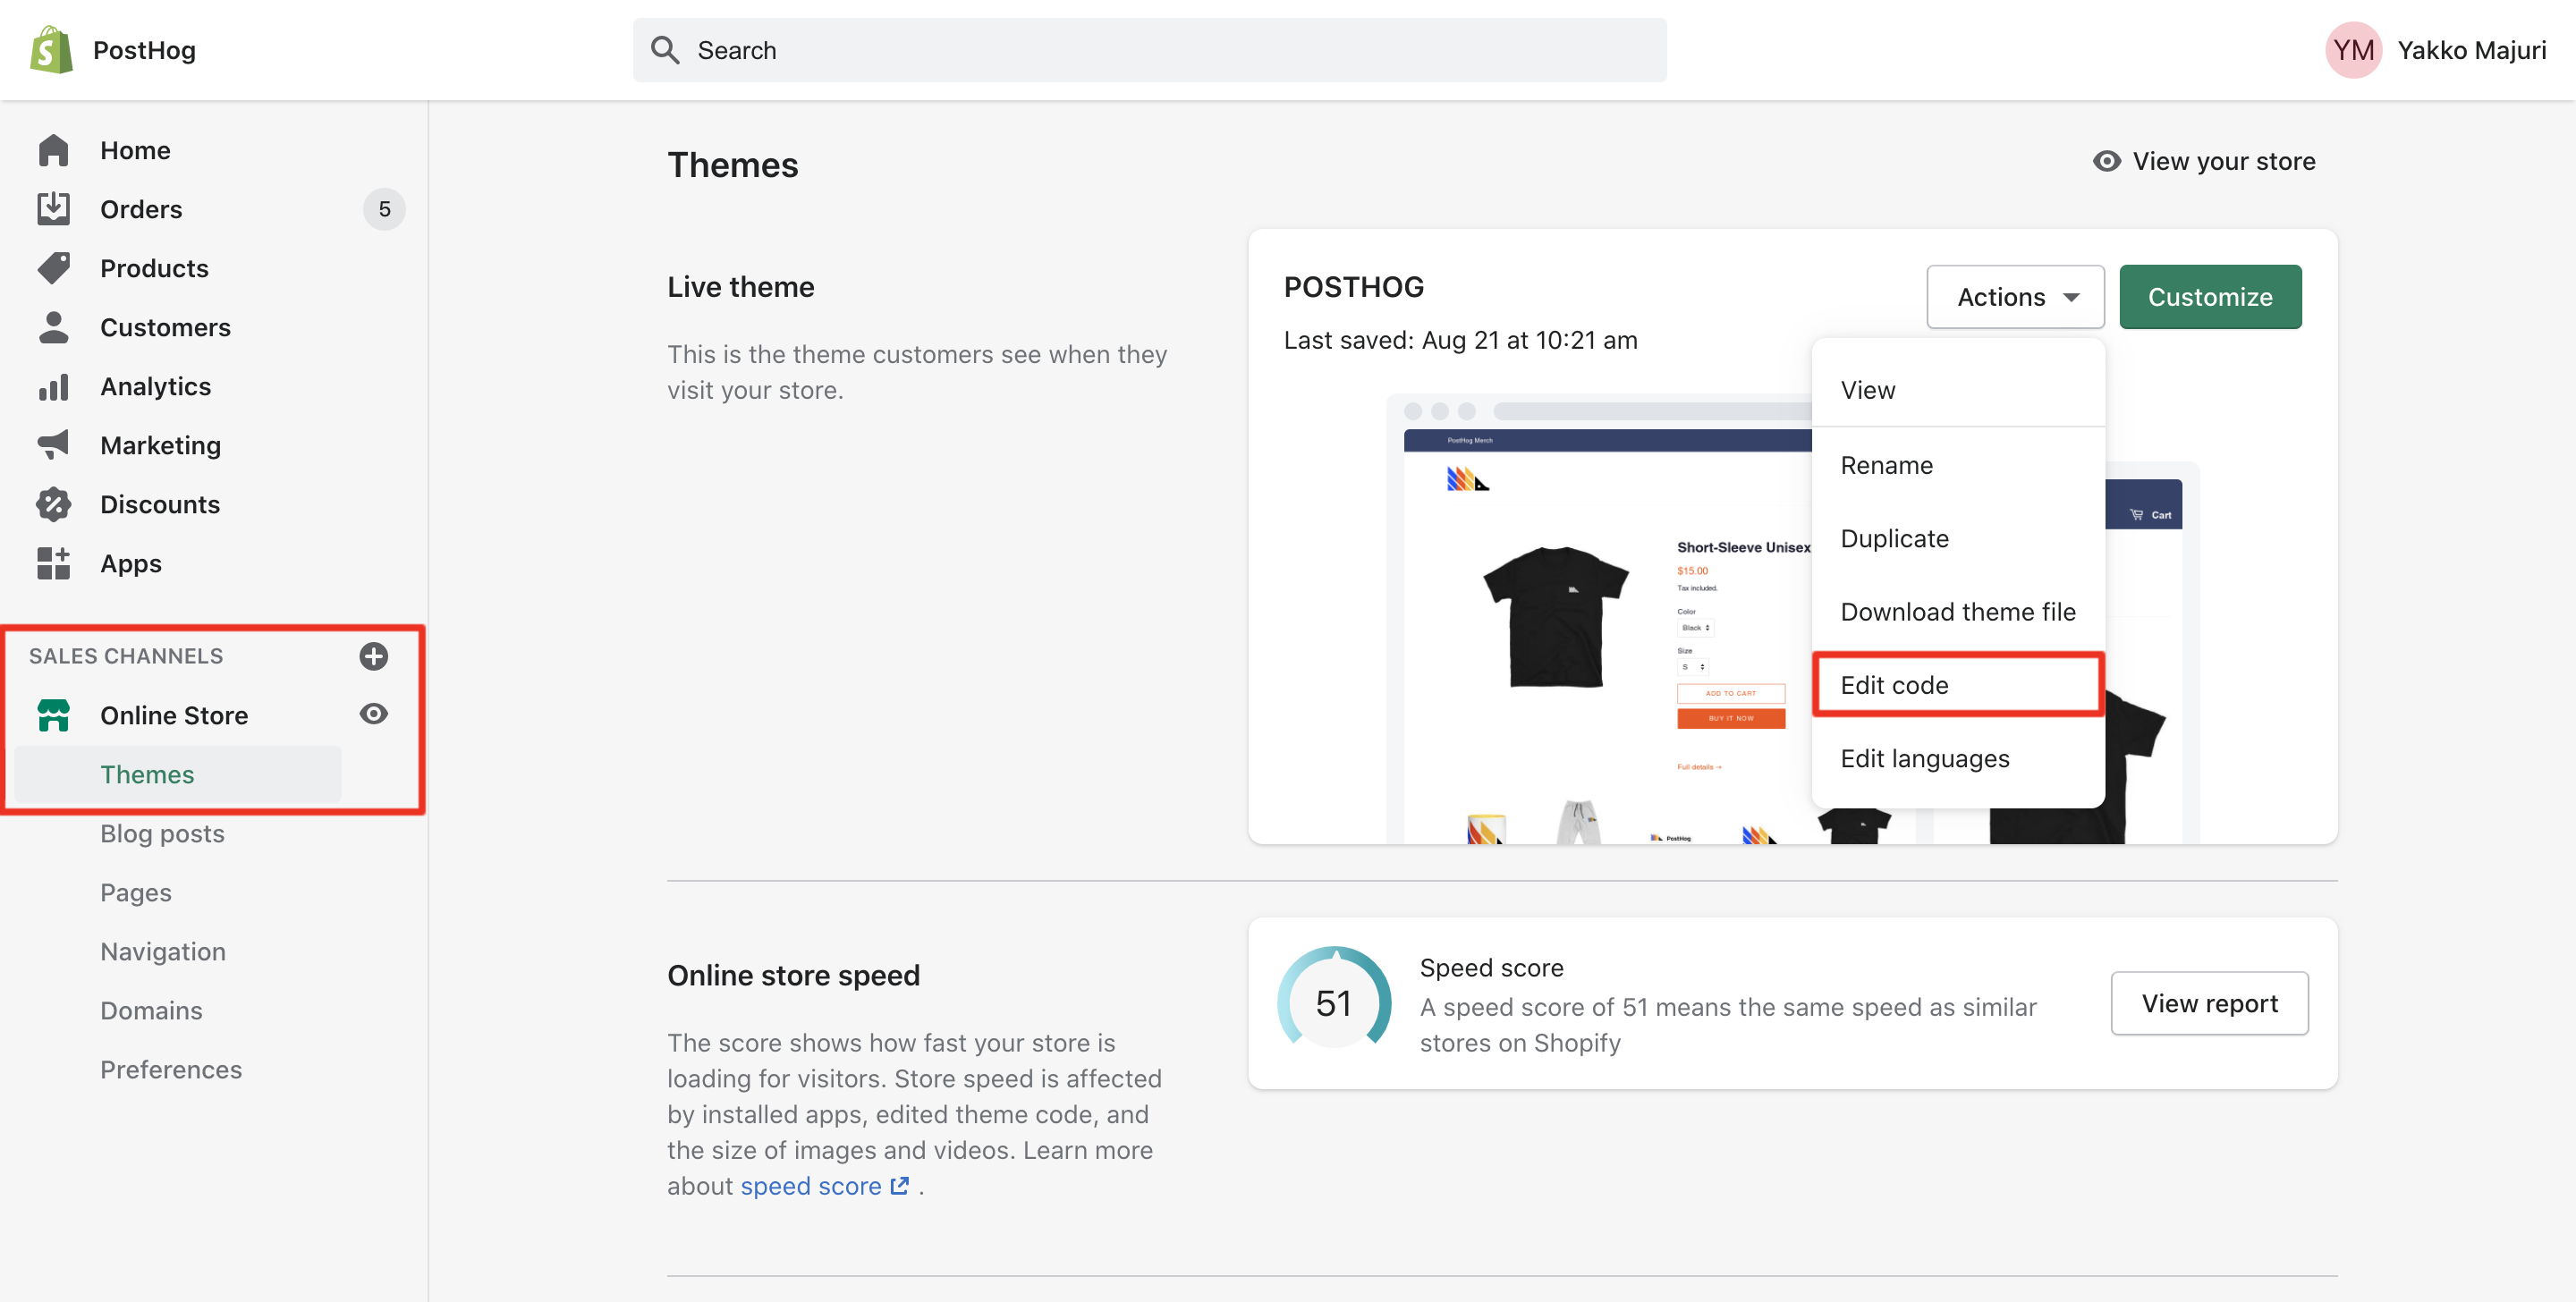
Go to 'Online Store' -> 'Themes' (see image below)
On your theme, click 'Actions' -> 'Edit code' (see image below)
You should now be seeing a code editor. Click on
theme.liquidunder 'Layout' on the left sidebar (see image below)Navigate until you see the closing
</head>tag. Paste your snippet there, before that tag, like in the image below: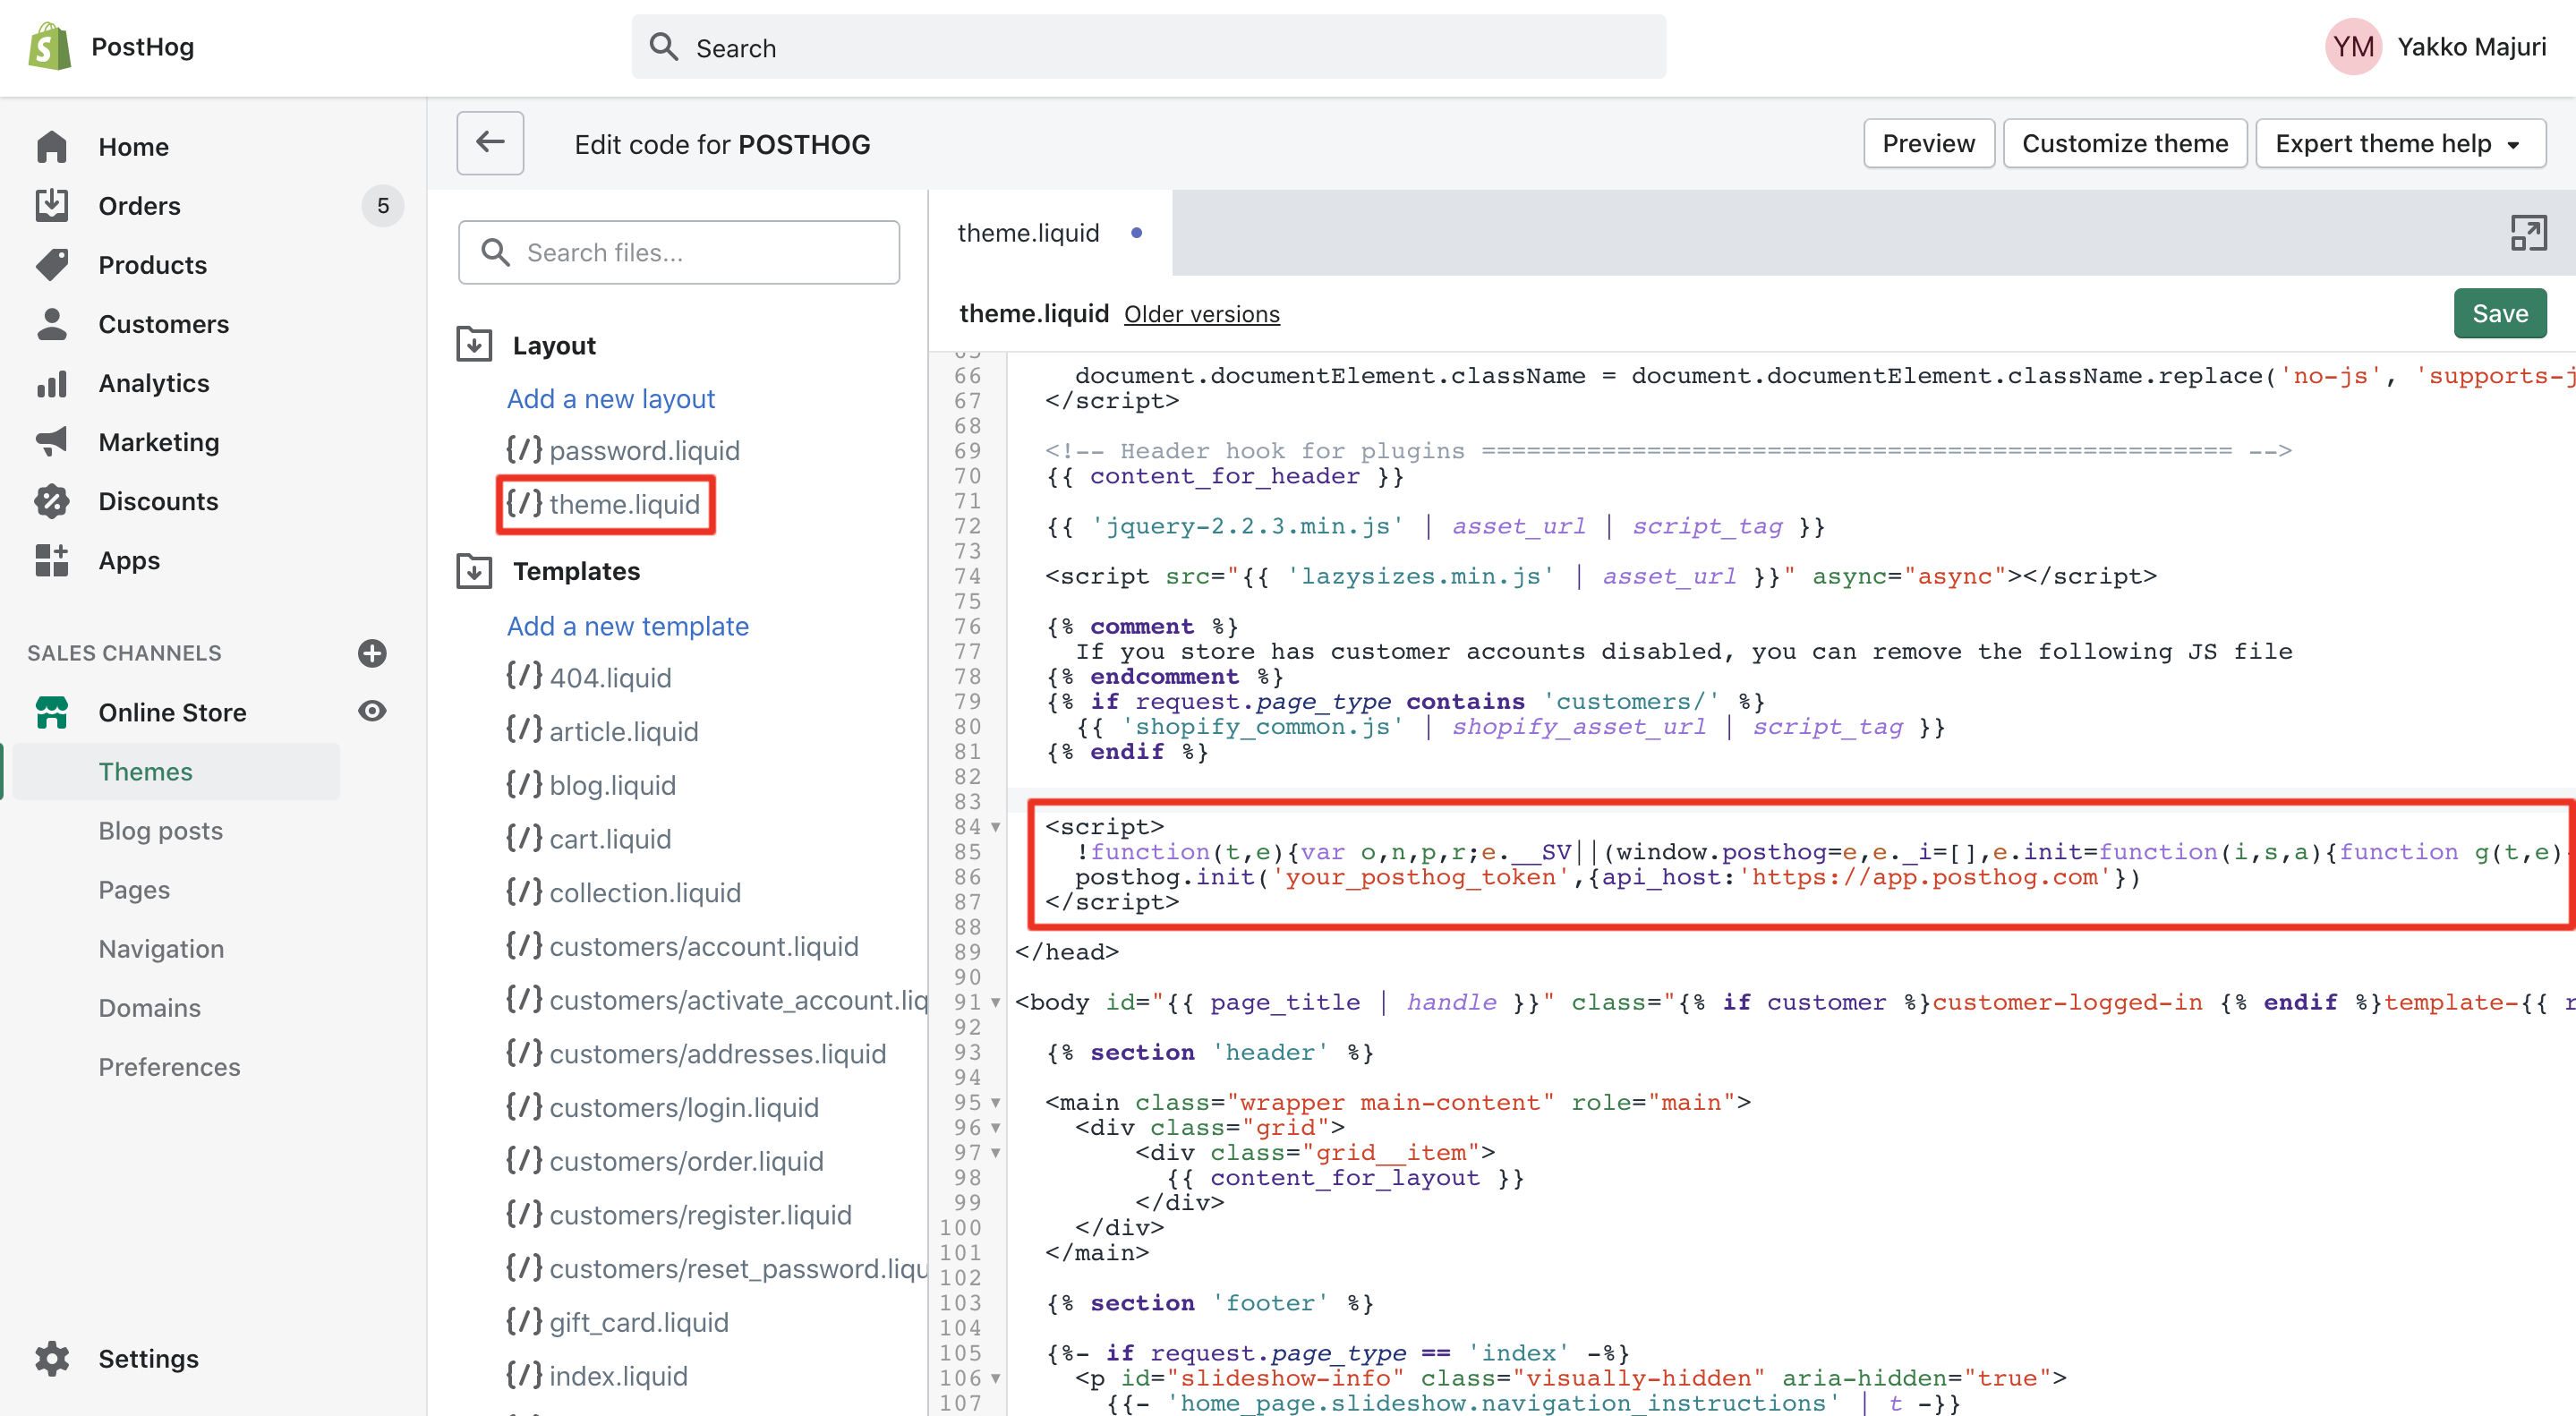
Click the green save button on the top right and you're good to go - PostHog should now be working on your Shopify store!
To confirm PostHog is configured correctly, visit your store and then check if the events from your session appear in PostHog. Note that this may take a few minutes.